Yes, it’s happening – LivePrompter is going Android! And since I’m using a cross-platform toolkit (Flutter) to build it, it is not out of the question that it may at some time also be going to iOS 😃.
To help you friendly alpha and beta testers get going, this is the place where you can find relevant information.
Important: I expect that you alpha and beta testers are already LivePrompter users and know your way about song files, set lists, etc. If not, please review the documentation for the “classic” LivePrompter Windows application and make yourself familiar.
Getting Started
Once you’ve installed LivePrompter from the Google Play Store, the first and most important thing is to provide LivePrompter with some content! Since access to local files is problematic on Android and especially iOS, I have built LivePrompter with Dropbox sync capabilities – once you allow it to access your Dropbox, it will be able to pull any changes you make to your LivePrompter files from your Dropbox.
This means: you definitely need a Dropbox account to use the Android version of LivePrompter! Fortunately, Dropbox are pretty generous with their free accounts, so that shouldn’t be a big issue, I hope.
So the general logic is this:
- Keep your song folder inside your local Dropbox files on your PC (or Mac or Linux machine, whatever).
- Create your songs and setlists etc on your PC and sync them to your Dropbox
- Authorize LivePrompter to access to your Dropbox and tell it where in your Dropbox your LivePrompter songs live; now LivePrompter will be able to download all your relevant files from Dropbox and also find out when something has changed and download only changed files (synchronization)
- After synchronization, copies of your LivePrompter files are stored on your mobile device, so you don’t need to be on-line during gigs – just in case you were starting to worry…
First Setup – in Baby Steps
Welcome Screen
The first time you start LivePrompter, the screen would look a bit boring and empty, because there’s no content yet. That’s why there’s a friendly little welcome message there that has hopefully directed you to this page
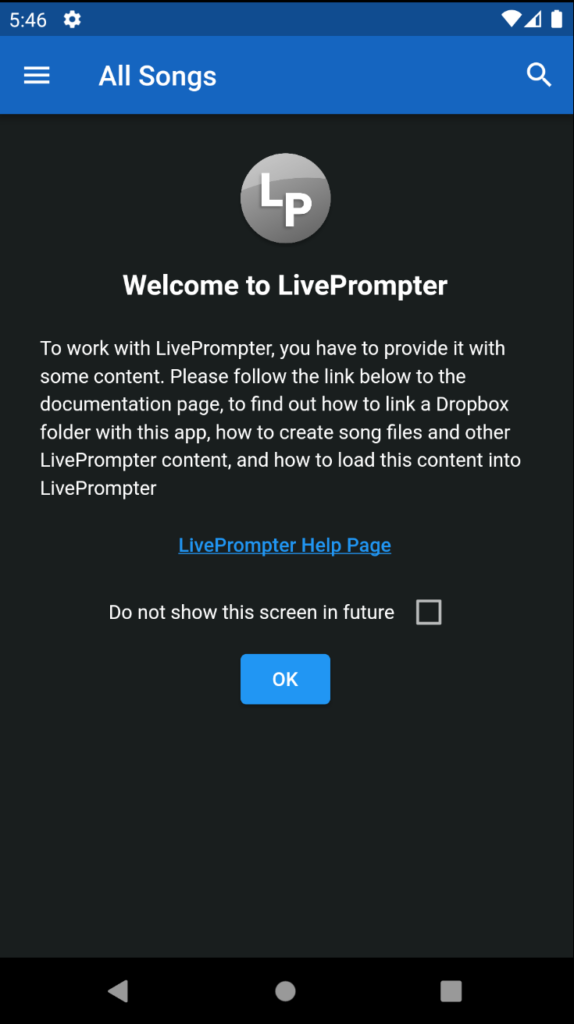
Now you can press the OK button to remove the welcome message – and if you want, you can also set the tick mark to not show this welcome message in future. Don’t worry about losing the link to the help page; you’ll also find the URL for this page on the “About” screen, so you’re safe hiding this welcome screen.
The Home Screen
Next, you’ll find yourself on the “home screen”. It still looks a bit empty, since we have no data, but we’ll definitely change that.
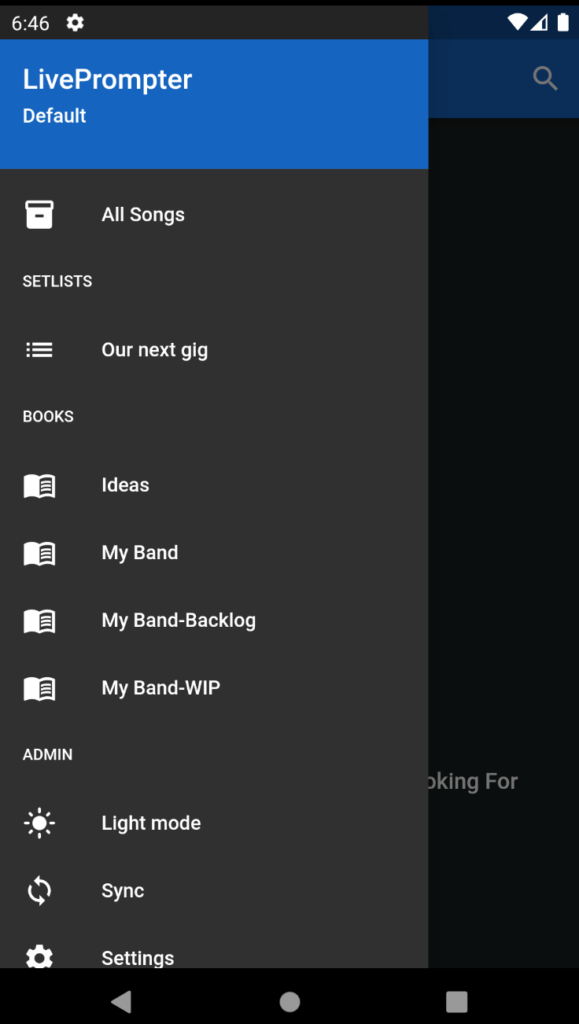
The Drawer
Now let’s open the “drawer menu” on the left by tapping the “hamburger menu” on the top left. This is where you’ll be able to select setlists and books (once we have them), but for the moment, we’re only interested in going to the settings page by tapping the “Settings” near the bottom.
The Settings Page
There are a ton of things you can do on the settings page – a lot of them will be familiar if you know your way around LivePrompter.ini and its settings, but there are also a couple of new ones.
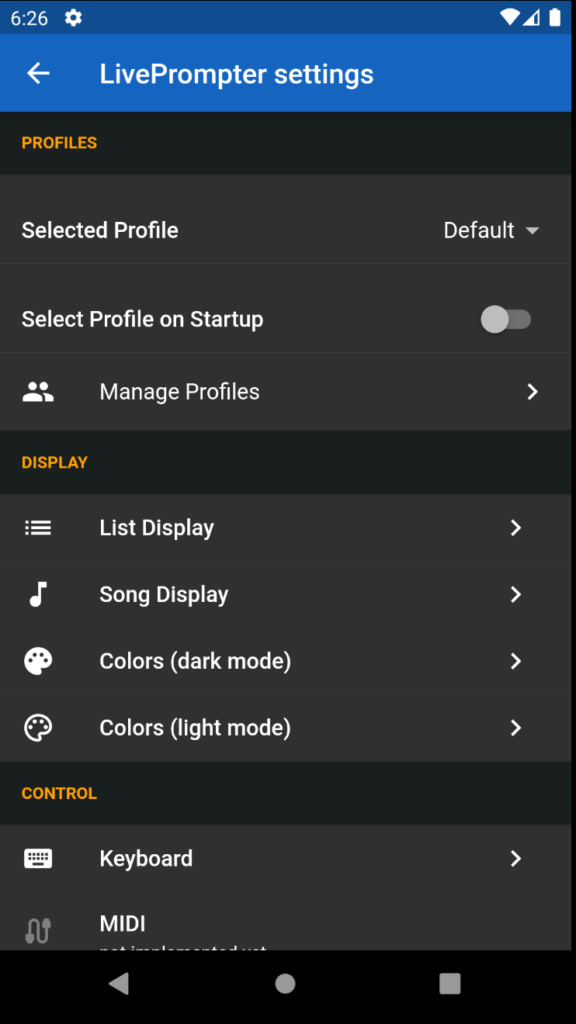
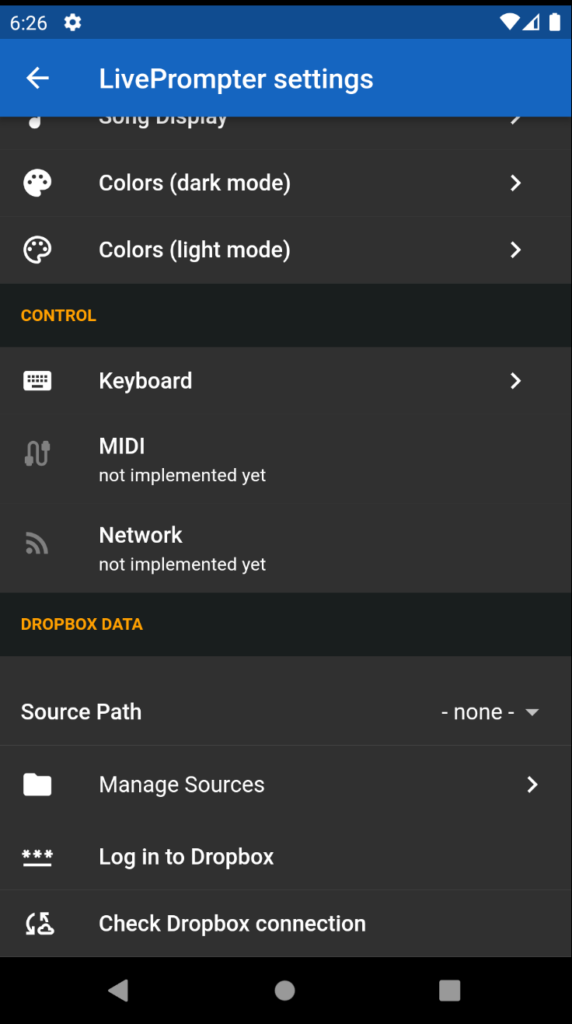
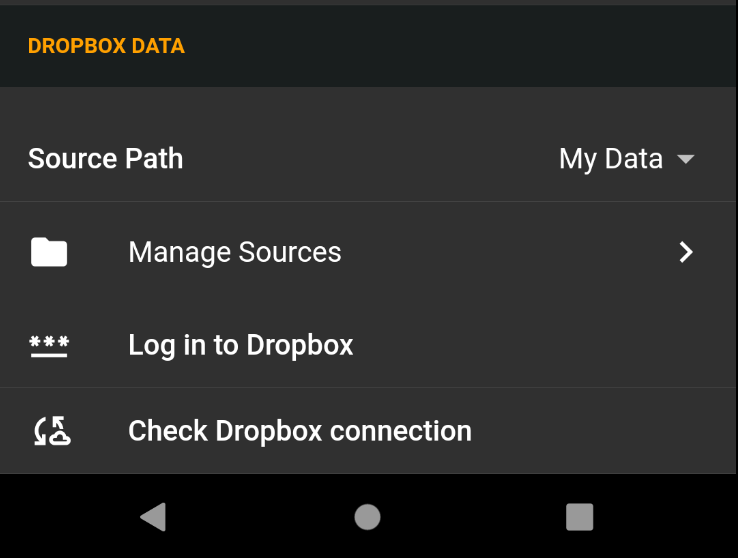
We can explore these later; for the moment we’ll head down to the bottom of the Settings page and tap on “Manage Sources” in order to set a Dropbox source folder for LivePrompter.
The Sources Page
This is the page where you manage your home directories (yes – you can have more than one!). A “source” is essentially a name for a folder within your Dropbox.
The sources page looks a bit empty, so let’s click the nice and friendly “+” button to create a new source.
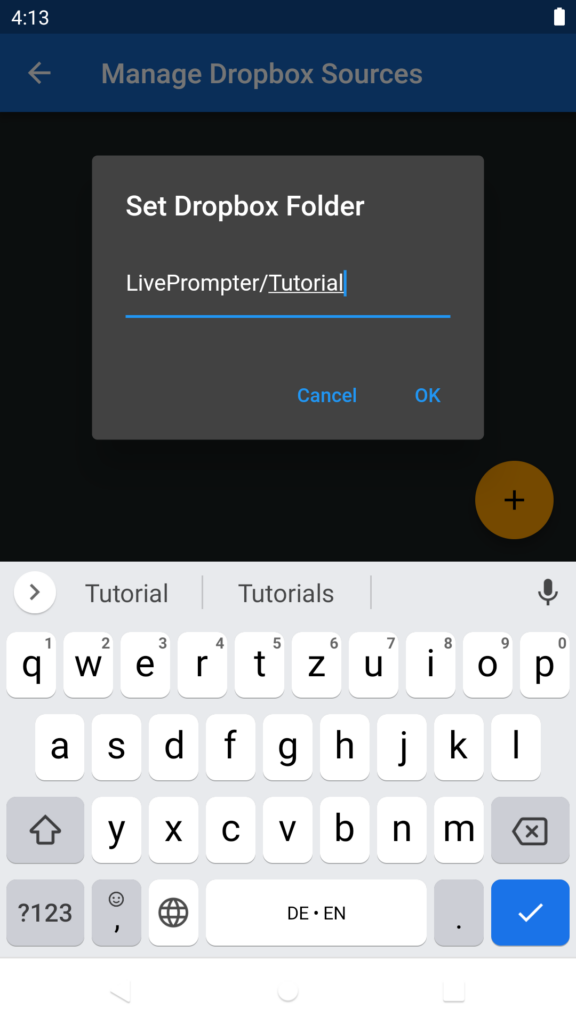
Now we first enter a name for this source – this is essentially just a label for the folder on your dropbox. It’s just easier to look for “My Data” than for e.g. “Music Files/My Band/LivePrompter/Tutorial/”
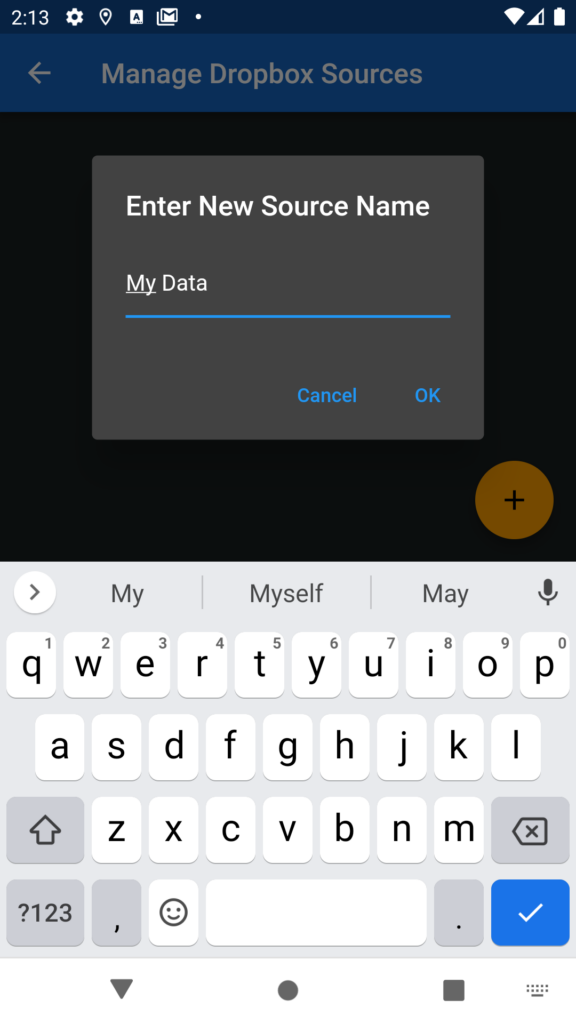
Next, you enter the folder where your LivePrompter data sits in your Dropbox. You need to provide the relative path within your dropbox folder to the LivePrompter data, not the absolute path on your PC.
So if your main Dropbox folder is “C:\Users\joe\My Documents\Dropbox\” and LivePrompter data sits in “”C:\Users\joe\My Documents\Dropbox\Music\LivePrompter”, your Dropbox Folder is “Music/LivePrompter”. Since my data for this tutorial sits at “LivePrompter/Introduction”, this is what I enter here – you’ll have to enter your specific path, of course 😉.
Important:
- upper/lower case matters here
- use slashes, not backslashes for your folder structure
- don’t put a slash at the beginning or the end of your folder path
OK, that’s done, now we head back to the settings page (tap the “back” arrow at the top left). LivePrompter still doesn’t know that it is supposed to actually use this source, so we need to tell it: we select our newly created source in the “Source Path” drop-down menu – this tells LivePrompter to use the “My Data” path for the current profile:
These are all the settings you need to make at this time. But stay on the Settings page for the moment – you’ll need it for the next step!
Authorizing Dropbox Access
Next, you need to authorize LivePrompter to have access to your Dropbox files. No worries about messing anything up by changing or deleting your files – it only needs READ access to download your song files to your mobile device.
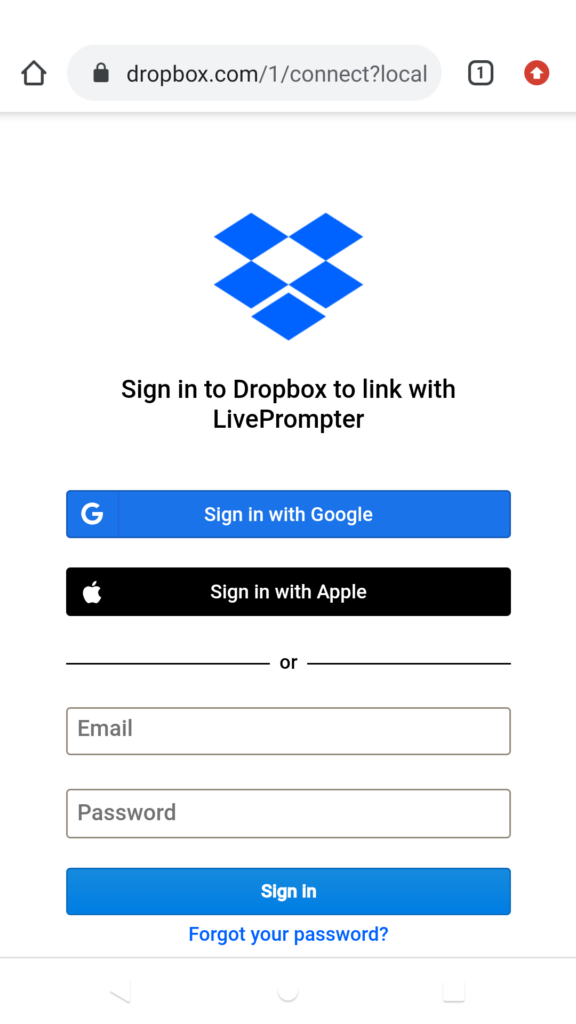
Tap the “Log in to Dropbox” tile, and you’ll open your favorite browser to go to Dropbox for the authorization (if you have the Dropbox app installed and logged in, this will look a bit different, but the process is very similar).
First thing: unless you are already logged in to Dropbox in your browser, you’ll have to enter your user name and password to log in to Dropbox.
Important: LivePrompter doesn’t store your confidential login information – this process happens entirely on the Dropbox side, and it results in LivePrompter getting an “access token” that allows it to read your files. This is a pretty secure state-of-the-practice process (called OAUTH2).
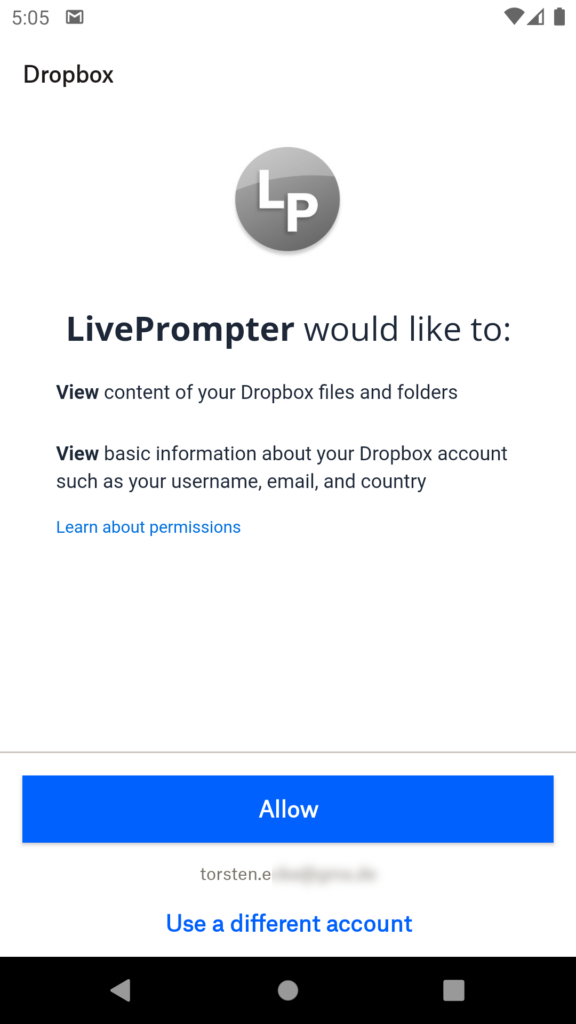
Once you’ve successfully logged in, Dropbox asks you if you want to approve LivePrompter to have access to your files – please click “Allow” here.
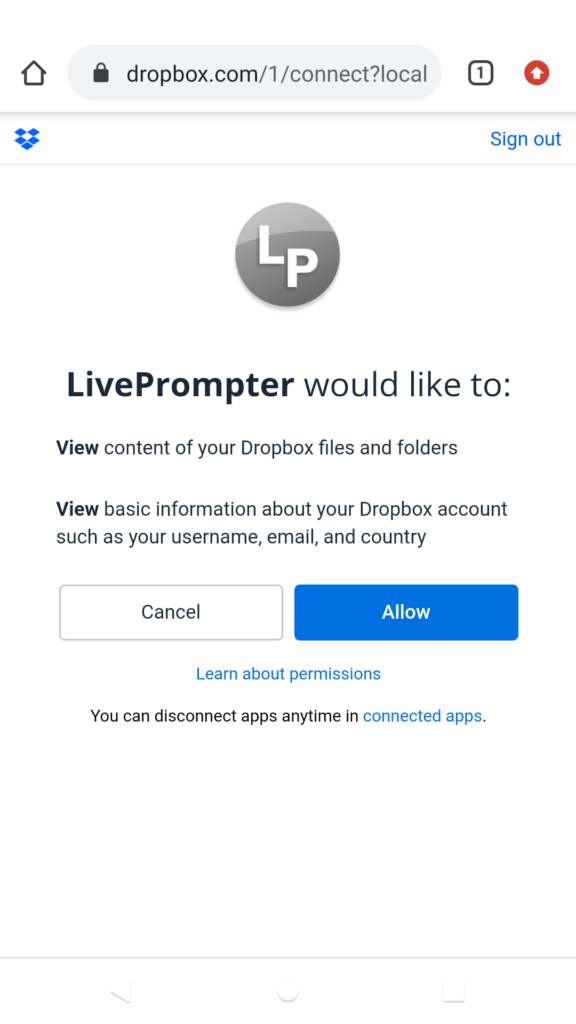
BTW: LivePrompter isn’t really reading your username, email or country – that’s just a permission that Dropbox gives any application it authorizes – don’t ask me why… So really the only thing LivePrompter does is read the content of your files in order to be able to download them to your mobile device. And that’s where they stay – LivePrompter isn’t “phoning home” or sending your data anywhere – scout’s honor!
If you have the Dropbox App installed and you are already logged in, things will look slightly different – instead of opening a browser, LivePrompter will open the Dropbox app to authorize access. This does the same, but looks somewhat different:
Note: this can also be helpful for situations in which security settings prevent the jump back from the browser to LivePrompter, and the authorization cannot be transferred – I’ve seen this on one occasion on a mobile phone with some security restrictions. In that case, I installed the Dropbox app, logged into the app and then started authorization from LivePrompter using the Dropbox app – that worked nicely.
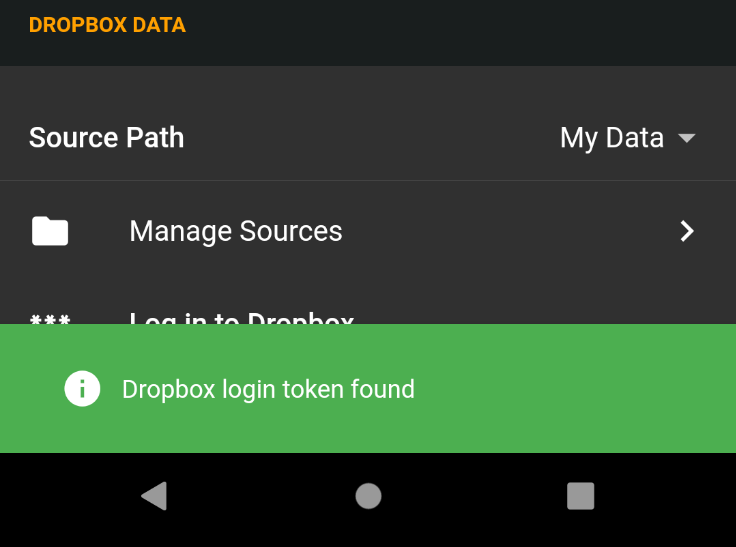
If everything goes well, you should automatically go back to LivePrompter and its Settings page now. You can check if authorization has worked by tapping the “Check Dropbox connection” tile – you should get a nice green success message popping up:
Now you can exit from Settings, and you’ll find yourself back on the – still empty – home screen. Let’s download some data from Dropbox to have more fun!
Synchronization with Dropbox
Pull up the drawer menu again, and then tap on “Sync” to go to the Sync page:
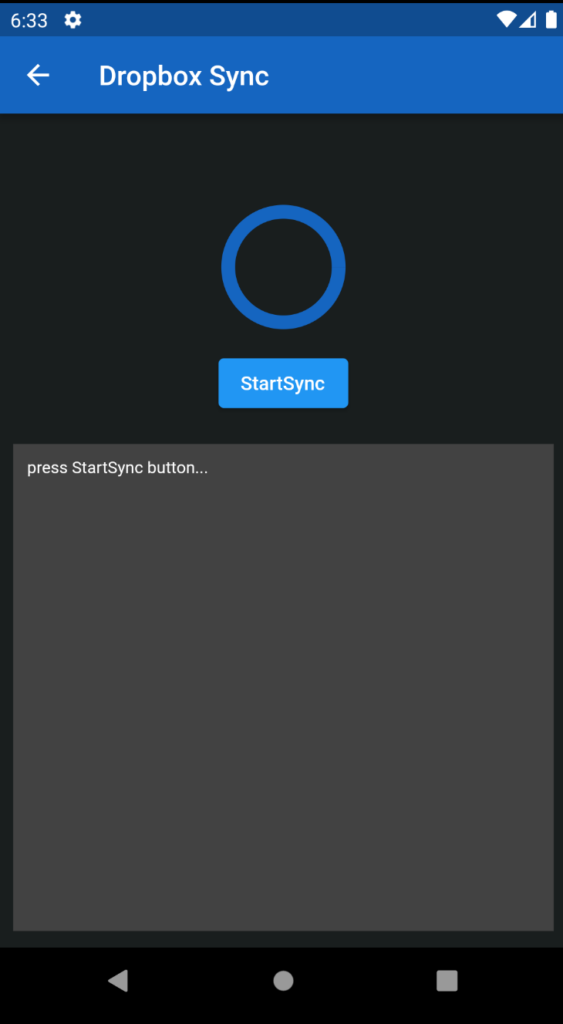
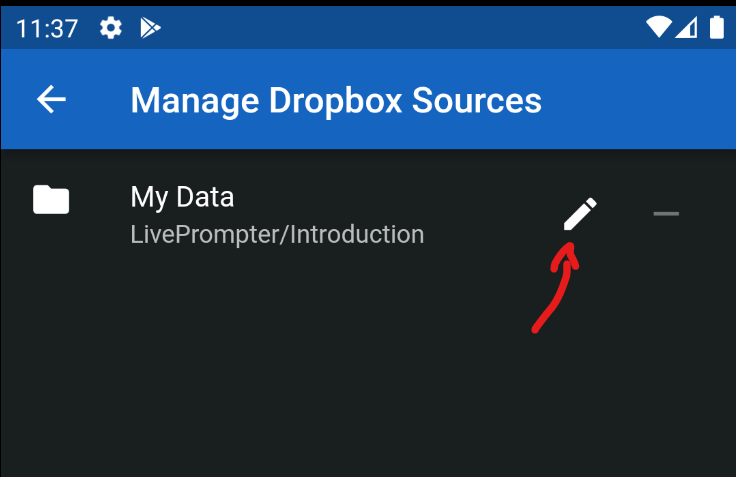
Tap the StartSync button, and LivePrompter will connect to your Dropbox and download the files from the folder you have set on the Sources page. If something doesn’t quite work out and LivePrompter complains that it’s not getting any files, you may have a typo in the path to your Dropbox folder – head back to Settings and the Sources page and edit the source by clicking on the pencil icon.
Another reason for LivePrompter complaining is that something may have gone wrong in the authorization process, so you could try running the authorization process again.
If everything goes well, LivePrompter will be busy for some time (depending on the number and size of files in your LivePrompter folder) and keep you informed of its process via status messages in the text box of the screen.

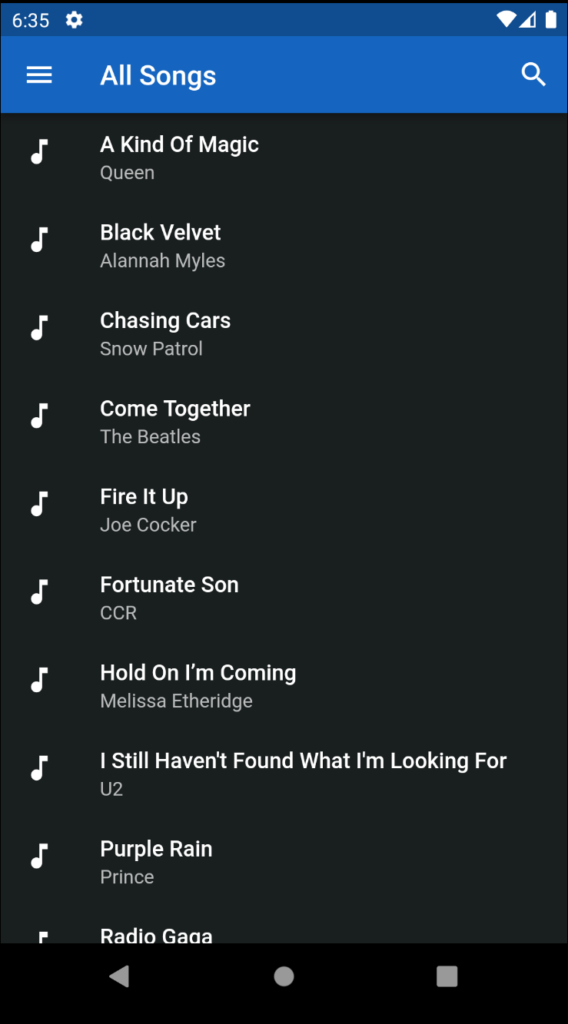
Once it is done (no more spinning circle), you can exit the synchronization page – and suddenly things look far nicer on the home page:
Also the drawer should now be populated with your setlists and books (if you have created any):
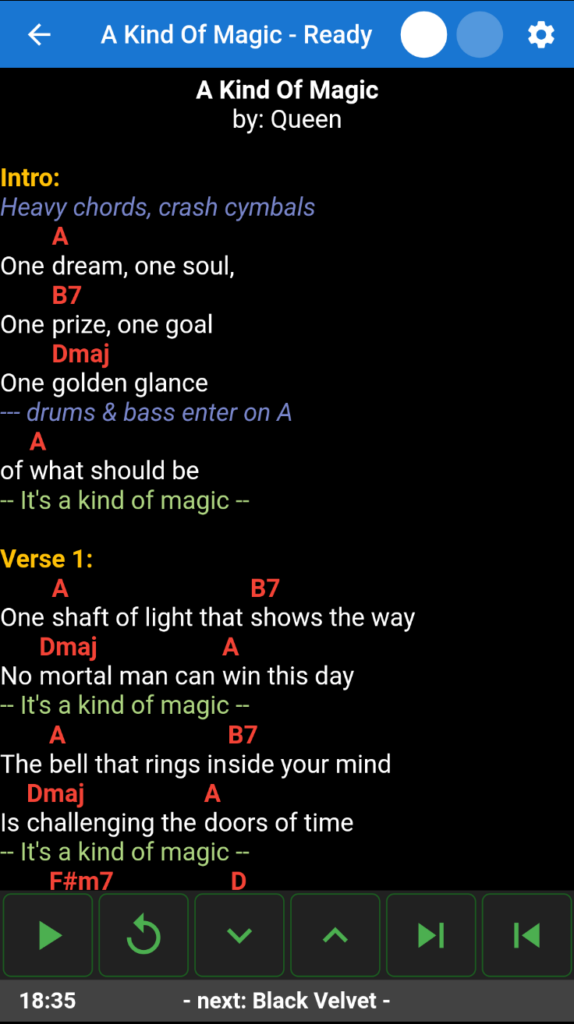
Now you can simply tap one of the songs on the home screen to get to the song page – everything should look pretty familiar to experienced LivePrompter users:
That’s it for the moment – you should now be able to use LivePrompter on your Android device. Give it a try, and let me know how things work out for you!
Bug reports
If you want to report a bug, just send me an email to info(at)liveprompter.com with the following information
- Subject of the email should start with “BUG:” – then I can sort it to the correct folder automatically 😎
- Brand/model of your mobile device
- Screen size (tablet / phone)
- Android version
- LivePrompter version (see the About page)
- Short description of the problem
- Steps to reproduce
- Expected result
- Actual result
- Ideally: screenshots that demonstrate the behavior
- Notes / remarks
The more precise you document your observations, the easier it will be for me to fix these pesky little bugs.
Thanks for your help!