Using the installer
The easiest way to install LivePrompter is to download the installer from the LivePrompter web site and run it. The installer will install LivePrompter in a directory of your choosing. One thing to note: since LivePrompter’s settings are controlled by an .ini file in the program folder, it is important to install LivePrompter into a folder for which you have write access rights (which isn’t usually the case for the “Program Files” folder). So: best to use your own folder outside the “Program Files” folder (e.g. C:\LiveTools\LivePrompter\). If you really, really want to install into the “Program Files” folder, then make sure that you give yourself write access for the LivePrompter subfolder.
The LivePrompter folder contains:
- LivePrompter.exe – the actual program file
- LivePrompter.ini – the configuration file (see below)
- graphics – a folder with button images. Best don’t change anything here!
- documentation – a folder with PDF manuals. Note: documentation will shift to this online knowledge base, so the information in the PDF will not always be the most current. Still, I’ll keep providing it for convenience
The installer will create a shortcut to the program on the desktop, as well as a shortcut to the program directory. You’ll need that link as well, because you change LivePrompter’s settings by editing the file “LivePrompter.ini” in the program directory.
The first thing you need to do is tell LivePrompter where your songs live, so you’ll need to edit the corresponding line in LivePrompter.ini that configures this location:
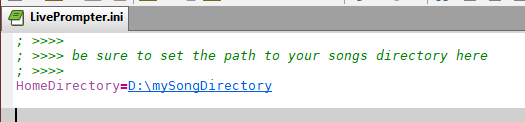
Important: the program directory and the Home Directory are different – the actual program and the configuration files live in the program directory, but it is not advisable to put your song files in there as well – too much potential for things getting confused or going wrong.
The LivePrompter installer should open your LivePrompter.ini automatically in your standard editor. So just replace “D:\mySongDirectory” with the location of your HomeDirectory. Ignore the rest of the file for the moment, save and close the configuration file, and you’re done!
Installing LivePrompter without the installer
If you don’t want to use the LivePrompter installer, you can also download a ZIP file with all necessary LivePrompter files. Simply unpack this ZIP file to a directory of your choice (remember: you need full write access), set your song directory in LivePrompter.ini (see above) and you are almost ready to rock. But when not using the installer, you’ll have to manually install the necessary fonts for LivePrompter, which you’ll find in the additional directory “fonts”. To install the fonts, simply enter each of the “fonts” subdirectories (“Roboto” and “Roboto Mono”), select all the font files contained within, and then right-click them and select “Install”. This should install the fonts to your Windows fonts folder.
Now you can start LivePrompter by double-clicking the program file LivePrompter.exe – of course you can also create a shortcut to this file on your desktop (the installer will do that for you automatically). Creating a shortcut also allows you to start LivePrompter with different configurations – we’ll get to that later.
Starting LivePrompter for the first time
Now you’re ready to give LivePrompter a first go – just double-click the shortcut and start LivePrompter. Have some patience – if you have many songs, startup could take some seconds, but then It should open with its main screen, showing you a list of the songs in your Home Directory.
If no songs are shown, the typical causes are:
- An incorrect setting of HomeDirectory= in your LivePrompter.ini – maybe you mis-typed the folder path? Also: make sure there is NO backslash at the end of the path.
- The files in your Home Directory aren’t text files – Word files or PDF won’t work. Also, files need to have the extension “.txt”, not the typical ChordPro extensions