After starting, you will first see LivePrompter’s main window:
It will probably look somewhat different for you, since you will have different songs in your song folder, but you get the idea 😉
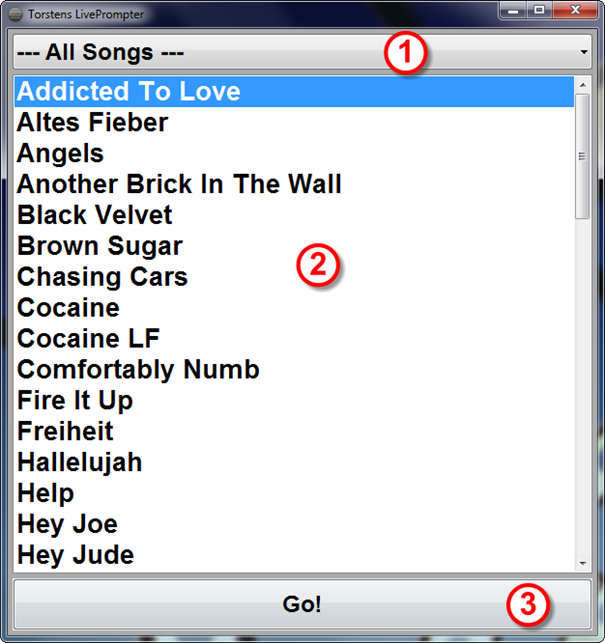
The main window has three elements:
- The list selector for books and set lists (1)
- The song list (2)
- The “Go!” button (3)
The list selector (1) allows you to choose which songs are displayed in the song list:
- All songs in the song folder in alphabetical order (“— All Songs —“)
- All songs belonging to a specific book (“Book. …”) in alphabetical oder. NB: songs can belong to multiple books. We’ll get to how to add songs to books later
- All songs from a set list, ordered in the sequence assigned in the set list file. I’ll show you how to create set lists later as well

Read about books and set lists in a separate chapter.
Important: choosing “— All Songs —“ also completely re-reads the song folder’s content. If you have created new song or set list files, you don’t need to re-start LivePrompter to display them – simply choose “— All Songs —“ and everything will be updated.
The song list (2) displays all songs chosen with the list selector. Clicking a song selects it (marked blue). After this, simply click “Go!” (3) and start display mode, starting with the selected song and proceeding further through the songs in the song list.
Displaying songs is (by default) always full-screen – no more program window or Windows desktop! After exiting display mode, you’ll get back to the usual Windows desktop with the main window.
Expert tip: instead of clicking “Go!”, you can also double-click a song list entry to go directly to display mode with the selected song. Also, pressing RETURN or ENTER will take you there.