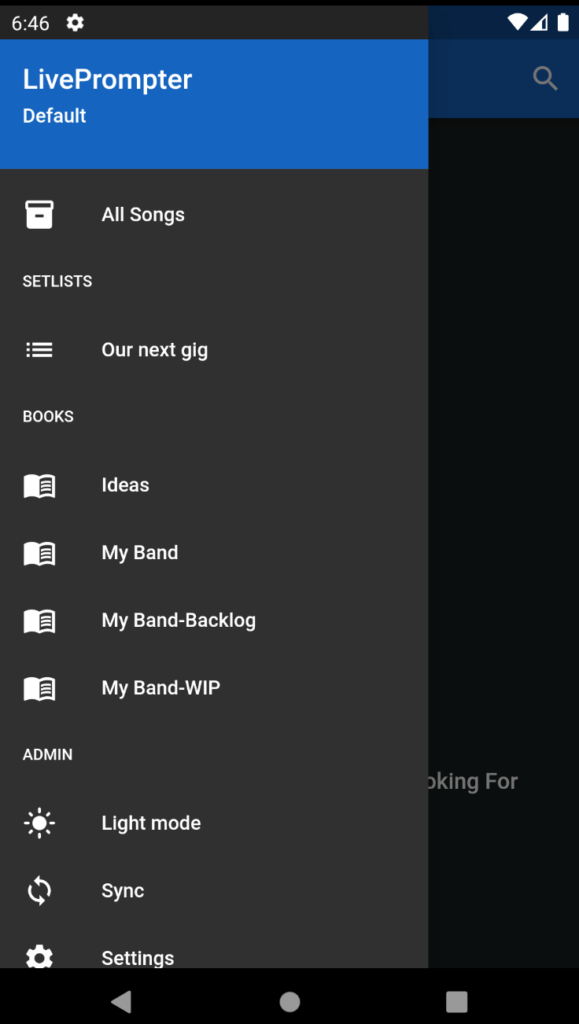
After starting, you will first see LivePrompter’s home screen:
It will probably look somewhat different for you, depending on the songs you have in your home directory, but you get the idea 😉
The main screen has four elements:
The Song List (1)
The Title Bar (2)
The Search Button (3)
The “Drawer” Button, also called the “Hamburger Menu” (4)
The Song List (1) displays the current selection of songs. Tapping on any song will take you to the song screen (see next chapter), so you can actually display and scroll lyrics and chords.
By default, the Song List will display all songs in your song folder, sorted alphabetically. You have a couple of alternatives if you want a different view:
use the Search Button (3) to go to the Search Screen (see below). There, you can do a quick search for songs by title and artist
Select a setlist (if you have created any) from the Drawer (see below). A setlist is a pre-selected set of songs, listed in a specific order – not alphabetically.
Select a “book” from the drawer. A book is a list of songs that you have marked as belonging to a certain category inside the song files. You can use books for all kinds of purposes, e.g. for having a quick list of party songs or ballads. Books are always sorted alphabetically.
There is a separate chapter on setlist and books – I’ll show you how to create and manage them there.
The Drawer gives you access to a number of useful functions: it gives you access to a number of administrative tools, and it allows you to select setlists and books to display in the Song List.
In its most basic form, the Drawer looks like this:
The elements are:
The Title Area (1) – it displays the name of the app, and below that, it shows the currently selected Profile. A profile is essentially a stored configuration of LivePrompter’s settings. You can define multiple such Profiles, which makes it easy to switch between different configurations. This can be super-useful if you want to manage content for different bands or projects, or if different musicians share a LivePrompter device. Initially, the profile is “Default” – and if you’re not planning to use multiple configurations, there’s nothing you need to do, and you can safely ignore this
The “All Songs” button (2) – does what it suggests and selects “All Songs” for the Song List.
The “Setlists” and “Books” section is currently empty – this changes once you create setlists and/or books.
The “Light Mode” button (3) lets you switch the LivePrompter color scheme to one with a light background – and back to dark mode again. Generally, it’s advisable to use LivePrompter in dark mode – you don’t want your face to be lit up by a prompter screen when on-stage. Dark mode is just more stage-compatible, that’s why LivePrompter always starts up in dark mode. But in bright light, especially when playing outdoors, a dark color scheme may become pretty unreadable – that’s when light mode can help you.
The “Sync” button (4) takes you to the Sync Screen – after our initial configuration, you should be familiar with the synchronization process.
The “Settings” button (5) takes you to the Settings Screen – you will have come across the Settings Screen during initial configuration. There is a whole Help section on LivePrompter settings, so find out more there.
The “About” button (6) takes you to the About Screen. There, you can find out the version of LivePrompter you are currently running, and it provides direct links to the LivePrompter home page and the Help page.
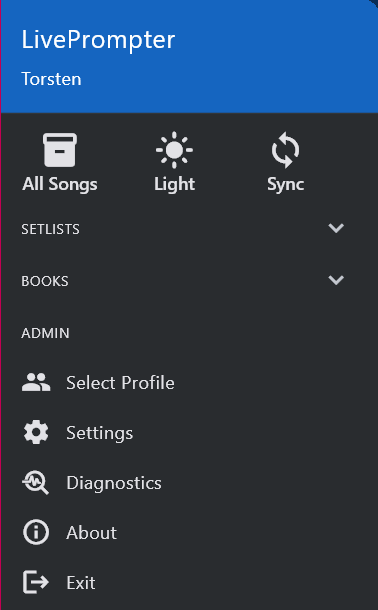
Once you create setlists and books, the Drawer becomes a lot more busy, and you may have to scroll down for the lower buttons:
Note: as of release 1.5.7, the drawer has been re-designed a bit: first, the “All Songs”, “Light/Dark Mode” and “Sync” items have been grouped at the top of the drawer for easier access. Second: the “Setlists” and “Books” sections are now collapsible/expandable (arrow button at the right of the title) so the menu doesn’t become too long and not so much scrolling is necessary.
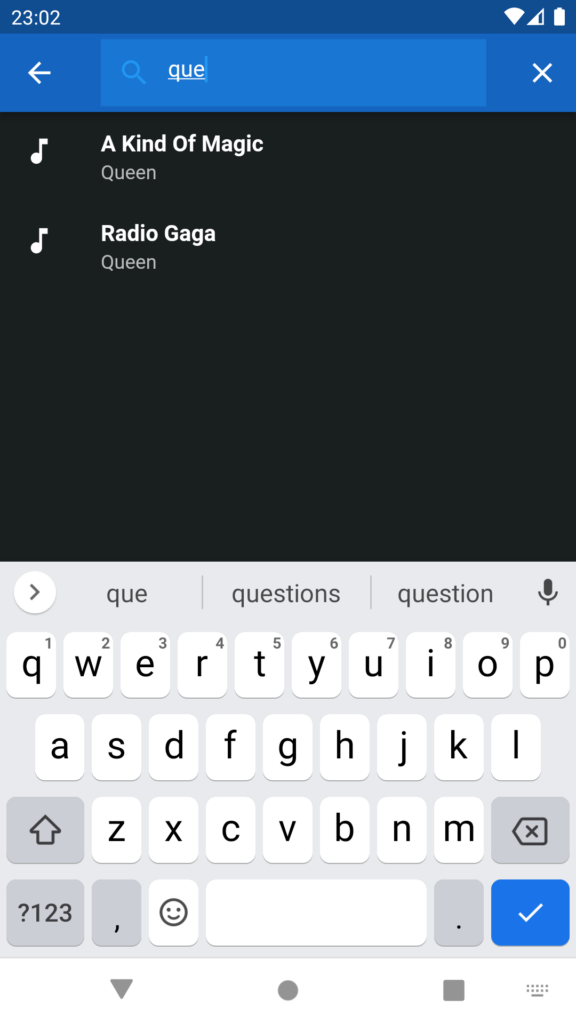
The Search Screen allows to quickly find songs in your repertoire. Simply type a few letters in the search field, and LivePrompter will display songs that contain these letters either in the “Title” or “Artist” tag. No fancy configuration or search options – this is built for ease-of-use in on-stage situations where you don’t want to fill advanced search forms. I’ve found that after entering 3 letters, I will usually have the song I’m looking for in my results list.
From the results list, you can tap any result to go directly to the Song Screen for this result. Stepping forward and backward in the Song Screen will step through the search results in the sequence they are displayed in.
Going back from the Search Screen (via the top left arrow button), you will find your Home Screen with the content you previously had there, so the Search function will not mess up your current setlist. This can be super-helpful when reacting to audience requests – go to Search, play the requested song, go back to your planned setlist and continue.